Installation
Overview
OPNsense is an open source, FreeBSD-based firewall and routing software that started as a fork of pfSense with aims to be a more secure, performant, and user friendly alternative.
For our use-case, it provides an intuitive user interface that allows easy configuration of DHCP, static mappings, and registering mappings/leases into UnboundDNS for local name resolution.
Installation & Configuration
The installation process will be broken into two components:
- Creation of the OPNsense VM on Proxmox
- Installation & configuration of the OPNsense software
Virtual Machine Creation
After your primary Proxmox node has been installed and configured, you will need to upload an OPNsense ISO (available at https://opnsense.org/download/ -- for our use-case we are using a DVD image on amd64 architecture).
For this VM configuration, if a component wasn't specified then assume the default values are sufficient.
-
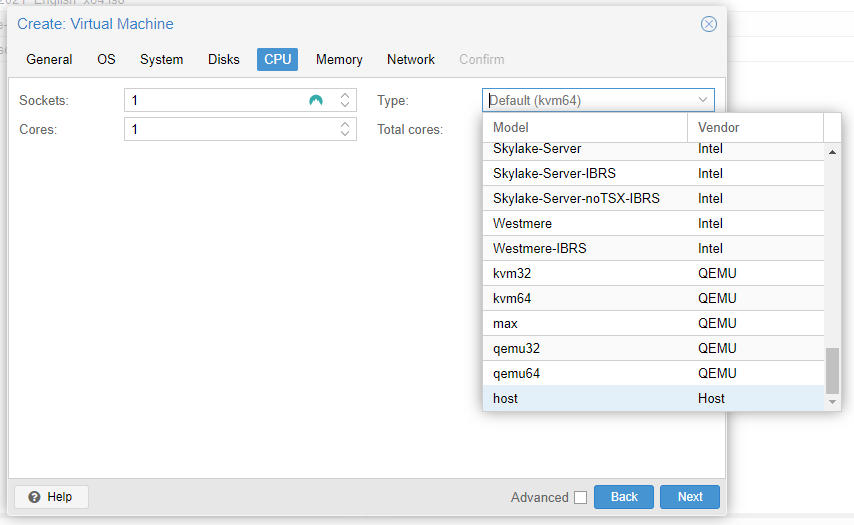
Give the VM 1 CPU core, and change "Type" from
Default (kvm64)tohostfor maximum CPU performance.
(For more information on CPU types, https://pve.proxmox.com/pve-docs/chapter-qm.html#qm_cpu)
-
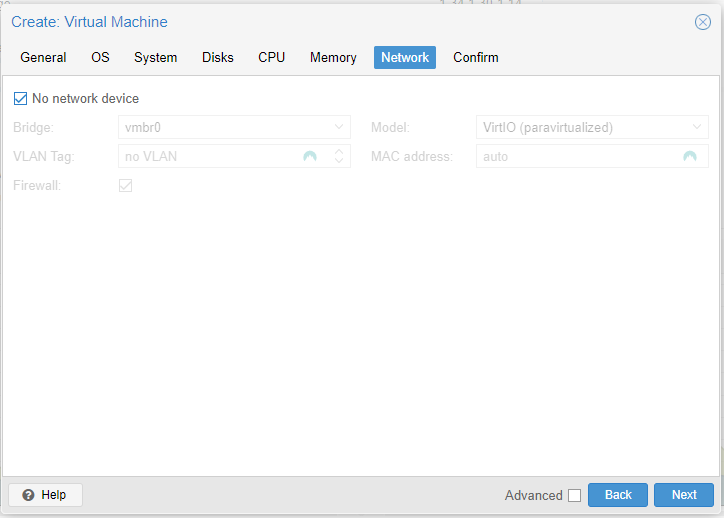
Select "No network device" because we will PCI passthrough a physical NIC post VM creation.
-
After the VM was created (but before it is started), navigate to the Hardware menu and Add a PCI device. Select your desired PCIe 2-port Gigabit ethernet -- for our use-case it was device
0000:03:00.0
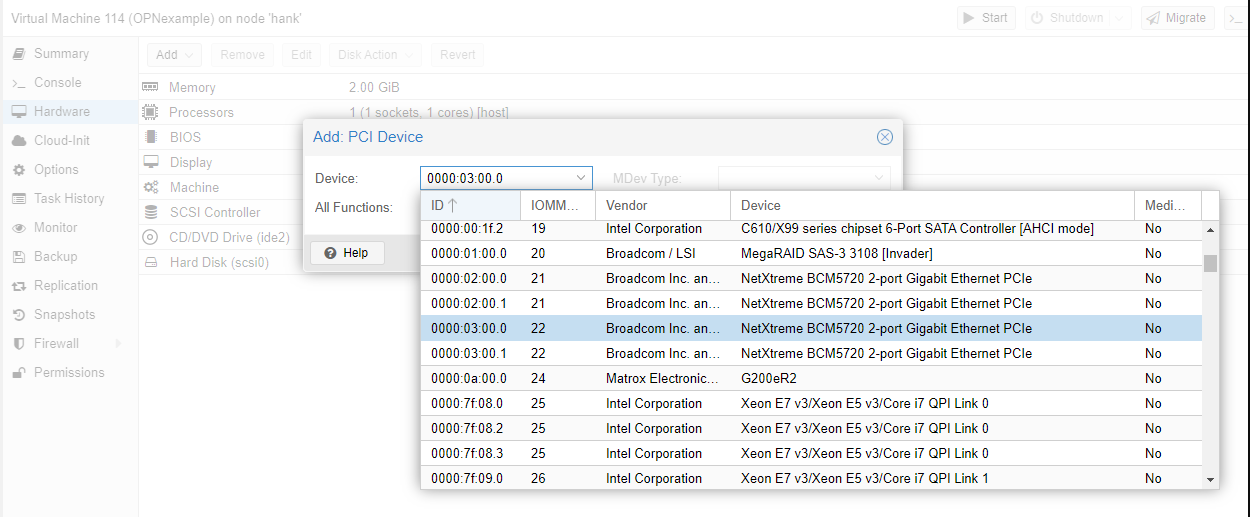
IMPORTANT: make sure to select "All Functions" for the PCI device, otherwise you won't be able to use both ports for WAN/LAN configuration.
TL;DR
- 1 CPU core (w/ CPU type set to
hostfor maximum performance) - 2048MB RAM
- 32GB Storage
- No (virtual) network device
- PCI Passthrough of 2-port Gigabit Ethernet (w/ "All Functions" selected)
Troubleshooting
If you're getting the status "Error: cannot prepare PCI pass-through, IOMMU not present" in Proxmox, there are a few more steps you will need to do to enable IOMMU. For more in-depth information, check out the PCI Passthrough documentation in the Proxmox Wiki https://pve.proxmox.com/wiki/Pci_passthrough.
For our use-case, we need to:
- Modify
/etc/default/gruband set GRUB_CMDLINE_LINUX_DEFAULT="intel_iommu=on" - Modify
/etc/kernel/cmdlineand add quiet intel_iommu=on update-grubproxmox-boot-tool refresh- Restart the Proxmox node
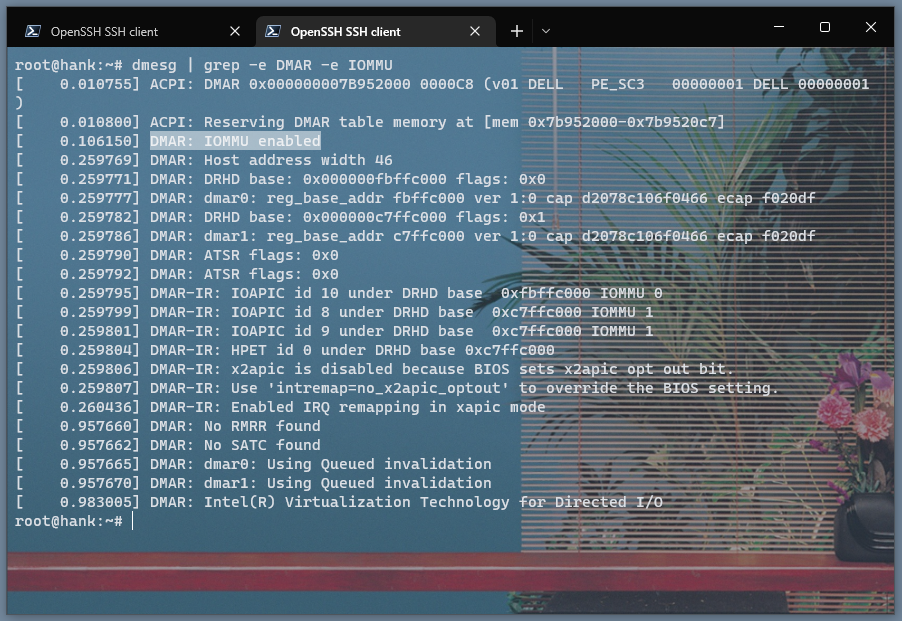
- IOMMU should now be enabled, and to check you can run the command:
dmesg | grep -e DMAR -e IOMMU
OPNsense Configuration
OPNsense has fairly robust documentation, so for anything not mentioned in this Wiki feel free to consult their documentation at https://wiki.opnsense.org/index.html.
Upon first boot, login using the installer credentials to begin installation.

login: installer
Password: opnsense
Most defaults should be sufficient. We opted for the UFS file system over ZFS due to our limited memory configuration. Change your root password. Once initial installation is complete, the system should reboot and you'll get access to the following management page (after logging in).
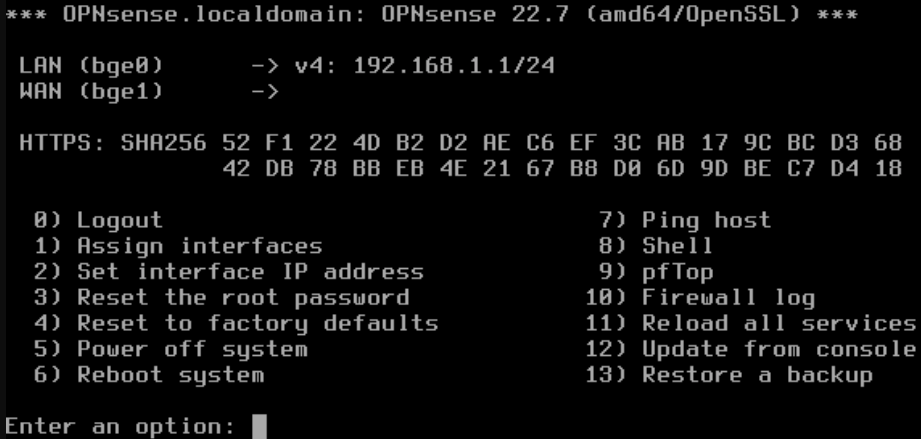
(Moving forward, if prompts are missing from this wiki, assume <ENTER> / no value was input.)
First, assign the interfaces (1). For our configuration, bge0 is WAN and bge1 is LAN.
Do you want to configure LAGGs now? [y/n]: n
Do you want to configure VLANs now? [y/n]: n
Enter the WAN interface name or 'a' for auto-detection: bge0
Enter the LAN interface name or 'a' for auto-detection: bge1
Next, set interface IP addresses (2).
For WAN:
Configure IPv4 address WAN interface via DHCP? [y/n]: n
Enter the new WAN IPv4 address. Press <ENTER> for none: 192.168.16.30
Enter the new WAN IPv4 subnet bit count (1 to 32): 24
For a WAN, enter the new WAN IPv4 upstream gateway address: 192.168.16.12
Do you want to use the gateway as the IPv4 name server, too? [y/n]: n
Enter the IPv4 name server or press <ENTER> for none: 8.8.8.8
Configure IPv6 address WAN interface via DHCP6? [y/n]: n
Do you want to change the web GUI protocol from HTTPS to HTTP? [y/n]: n
Do you want to generate a new self-signed web GUI certificate? [y/n]: y
Restore web GUI access defaults? [y/n]: y
For LAN:
Configure IPv4 address LAN interface via DHCP? [y/n]: n
Enter the new LAN IPv4 address. Press <ENTER> for none: 10.10.1.1
Enter the new LAN IPv4 subnet bit count (1 to 32): 16
Configure IPv6 address LAN interface via WAN tracking? [y/n]: n
Configure IPv6 address LAN interface via DHCP6? [y/n]: n
Do you want to enable the DHCP server on LAN? [y/n]: y
Enter the start address of the IPv4 client address range: 10.10.100.1
Enter the end address of the IPv4 client address range: 10.10.100.255
Do you want to change the web GUI protocol from HTTPS to HTTP? [y/n]: n
Do you want to generate a new self-signed web GUI certificate? [y/n]: y
Restore web GUI access defaults? [y/n]: y
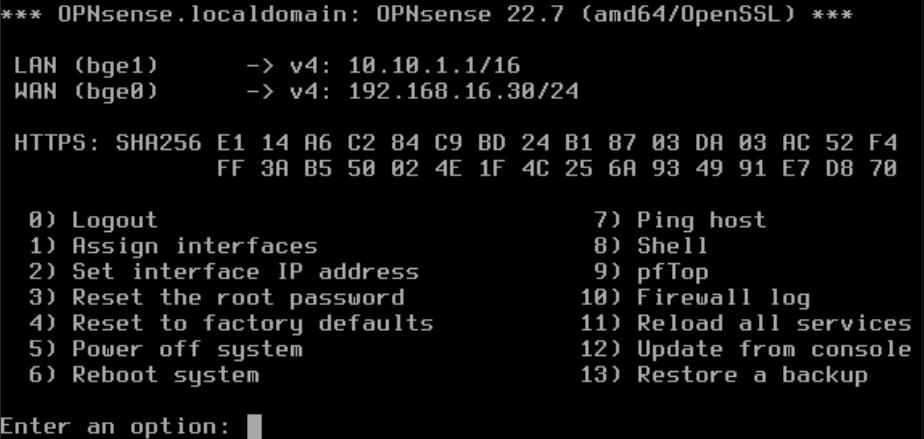
Once this initial configuration is complete, you should now have rudimentary internet access, and be able to do all remaining administration/management via the web GUI at https://10.10.1.1